Amazing Roofing Collection: Part Two.

Part two of our inspiring roof collection started in January. We just found too many good ones for one post:

Image

This Tree and trellis combination make a marvelous roof for this sitting room.

Image

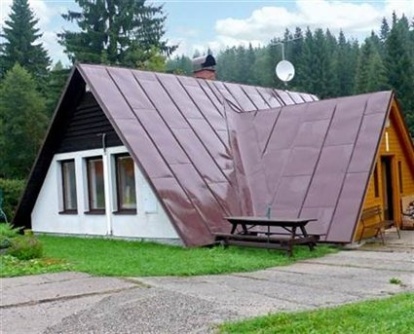
This red roof makes a bold statement, half painted and half natural colors.

Image

Condo/apartment complex in Barcelona, Spain.

Image

Country thatched roof in the UK.

Image

The famous ‘onion’ roofs of Moscow.

Image

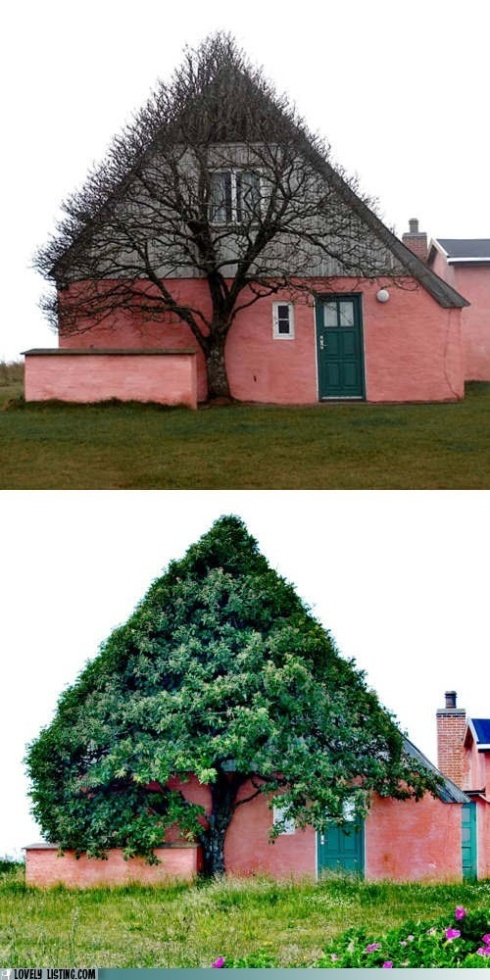
Is it a roof-tree or a tree-roof? Either way we love it.

Image

Fairytale cottage with rolled-roof in California.

Image

A great roofing situation for a very snowy area.

Image

A succulent ‘green’ roof on a shed.

Image

A rolling ‘green’ roof by the ocean.

Amazing Roofing Collection: Part One.

This is a collection of some of the most interesting and inspiring roofs form around the world. We collected so many we are splitting this blog into two! Here’s round one:Image

Roof garden: We have a lot of fun “green roofs” on this post, but this one is the only delightful country garden.

Image

Farming: An urban roof farm in Brooklyn, New York.

Image

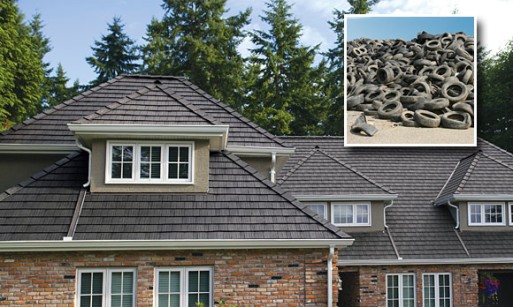
Recycled: This roof is made entirely from used tires. We wonder, does it smell like burning rubber when the sun is blaring?

Image

Decorative: The roof at the Grand Palace makes quite the colorful statement!

Image

Clay: This clay roof touches both the sky and the grass.

Image

Whimsical: Looks like it was pulled right from the pages of a fairytale book!

Image

Roof-pool: We see roof pools a lot in the city, but this one takes the concept to whole new level. So very beautiful and serene.

Image

Desert: Not all roof gardens are perfectly lush and manicured. This “green roof” blends perfectly with it’s natural desert surroundings.

Image

Siding: When roofing becomes siding…

Image

Urban garden: Top of City Hall in Chicago, Illinois.

Image

Painted: Beautiful painted roof in the country.

Roof farming: Check out these goats that live on a restaurant roof in Sister Bay, Wisconsin!

**Stay tuned for the second part!

Decorating Your Roof & Exterior SAFELY for the Holidays

Image
It’s the time of year when the holiday decorations make their way out of storage and onto your home. From wreaths to extravagant holiday light displays, many homeowners strive to have “show-stopping” decorations. If you are one of those families that decorate the outside of your home for the holidays, we have put together some tips that will keep your home and yourself safe. While decorating and deconstructing your decorations after the holidays, keep the following checklist in mind:
  • Safety first. Basic common sense will come in handy when decorating your home. Make sure to set up ladders on level ground; avoid hard to reach areas; and make sure you have someone with you when you are working on a ladder. If you are uncomfortable hanging lights high on your home, there are many companies that offer these services.
  •  Stock up on supplies. Many people choose to hammer small nails into the edge of their roof to hang strands of lights. These small nails, which can be moved after the holidays, become water intrusion points and can lead to roofing damage down the road. Instead, prepare for your decoration project by purchasing clips designed specifically for this purpose; they are relatively inexpensive and can save you a lot of stress in the future.
  • Test, test, test. Make sure you test all of your holiday lights prior to hanging them. Not only would it be highly irritating to hang and promptly remove the lights due to not functioning properly, a potential short might result in a fire hazard.
The holidays are a great time to highlight your home, celebrate with family and count your blessings. From all of us at Jerry’s, be safe decorating this season and remember to protect your home.

Using Your Attic to Determine the Condition of Your Roof

What homeowner wants to brave the winter elements to check on the health of his roof? And yet, given the crucial role roofs play in determining a house’s efficiency (yes, that means utility bills) most people think they have no choice but to go mano-a-mano with all that snow and ice, ladders, and recreation of a bad Christmas comedy… Turns out most people are wrong, you can just check your attic instead.

So here are 4 simple checks to mark off your list while looking up:

1. Animal damage. Have those pesky birds, bats, squirrels and raccoons have gotten snuggly in your attic?  Any signs of nests, droppings and gnawed wood, wires or insulation, should set off a red-light alarm in your head. First, call a pest professional immediately. Second, call a roofing specialist to asses the damage.

2. Leaks. “Tut tut, it looks like…” a fancy Nor’easter? It’s gonna rain. It’s gonna snow. It’s going to get ugly. And when it does, shine a flashlight up in the attic in search of not just dripping water and condensation, but also water stains on the ceiling, walls and floor.

3. Ventilation. “The attic is like the lungs of the house,” says Joplin. “It must be able to breathe in order to function properly.” Therefore, if your vents are stuffed with debris, they need to be cleared.

4. Structure. Now that you’re in the attic, take a look up. Are sections of the roof sagging? If so, that signals potential structural weakness requiring professional repair.

**Bonus tip: Of course, for those who insist on venturing outside in the cold (because that’s how we separate the men from the boys, of course)- You can still check for structural deformities without climbing any treacherous ladders by using binoculars to zoom in. From the safety of the ground, quite the novel idea! Look for missing shingles, and broken gutters.

The Chill is Already Here! Learn About Winterizing Your Windows…

It’s here, and we certainly can’t avoid it- the chill. Chances are if it’s starting to cut through your jeans, it’s capable of seeping through your windows.

Windows can be your best friend or worst enemy during the cold dark months of winter. On the one hand, they allow light and warmth from the sun into your home and are your portals to the outside world. On the other hand, they can allow heat to escape, driving up energy costs, and costing hundreds of dollars per year.

It is estimated that as a whole, homeowners in the United States waste $25 billion in heating air that eventually leaks through improperly insulated windows.

Proper preparation can save you a significant amount of money in heating costs and keep you warmer this winter.

Sunlight can be a natural source of heat, even in the winter. Some glass has a thin coat on one side which allows the sun to penetrate from one direction but is tinted in such a way that the thermal energy remains inside. This type of tinting is generally found in double-glazed glass – windows with more than one layer of glass – because it is delicate.

Even without special tinting, it is important to keep your windows clean to maximize the amount of sunlight penetrating your home.

The type of frame you use is significant, too. Frames made out of aluminum are susceptible to expanding in the hot weather, causing leakage. Vinyl frames are low cost and mold well to any shape, but are liable to warp or twist. Wooden frames are more reliable and aren’t as affected by temperature extremes, but may crack or warp from moisture. Fiberglass frames are fairly new, and don’t shrink or warp. Wooden frames are generally considered more attractive.

Regardless of what kind of materials are used, the actual condition of the windows is a key factor in minimizing heat loss. Look at the frames of your windows. Different kinds of window frames are susceptible to a varying amount of leakage. The quality of the frame is also a concern. In order to minimize heat lost through a leaky frame, you may want to use caulk to close any holes, or add weather stripping around the areas where leakage is more likely.

The best way to reduce energy wasted through old windows is to replace them with new energy efficient windows.

The quality of newer windows far exceeds even the finest quality windows that are 20 years old or more. This is an investment that pays for itself in comfort and savings on heat and electric bills in both winter and summer months.

Tips for DIY:

  • Before applying caulk, remove old caulk and paint residue from the window with a brush, putty knife, or fluid designed to dissolve the residue.
  • Apply the caulk to all joints of the frame, including where the frame meets the wall. Caulk should be applied during dry, warm weather to set properly.
  • Weather stripping seals the movable part of the window where it comes in contact with the frame or fixed part of the window. It is generally made of rubber, felt, vinyl, foam, or metal.
  • Storm windows will also help keep energy costs down by providing an extra layer of protection from the wind and helping to contain condensation. They can reduce heat loss by 25 to 50 percent.

Have you considered your decorating?

Another way to retain heat comes from your choice of window treatments. No matter what you use to cover your windows, keeping the covering open during the day will allow the sun’s rays to contribute to the heating of your house, and closing them at night will keep some of the heat in. Treatments that let heat into the house include drapes, roller shades, Venetian or vertical blinds. Be aware of any external shading devices that may block sunlight, such as awnings, roof overhangs, or shutters.

Just a small bit of knowledge and preparation can save you a couple of bucks in heating over the winter, and over time, it can add to quite a penny.

Highlighted excepts from “How to Prepare Your Windows for Winter” By Dave Hoffman.

Time for Spring Cleaning!

Taylor Global LLC

Home Maintenance Checklist for Spring


Most homeowners know regular maintenance is a must. Anytime is the perfect time for routine maintenance checks on many areas of your home. But how do you decide what needs to be done, and in what priority?

The experts at ServiceMagic.com, a Web site that helps connect homeowners with prescreened contractors in their area, offer the following checklist to help you shape up your home:

  • Gutters and downspouts:  Remove leaves and debris from gutters and downspouts. Reattach gutters that have pulled away from the house. Run a hose on the roof and check for proper drainage. If leaks exist, dry the area and use caulking or epoxy to seal the leak.
  • Siding: Clean siding with a pressure washer to keep mold from growing. Check all wood surfaces for weathering and paint failure. If wood is showing through, sand the immediate area and apply…

View original post 401 more words

MD Home & Garden Show Preview Party

The Maryland Spring Home & Garden Show will be held this year the first two weekends in March at the Maryland State Fairgrounds in Timonium.

We wanted to spotlight something special though … The Garden Preview Party to benefit Habitat for Humanity Chesapeake. Habitat for Humanity Chesapeake’s parent organization, Habitat for Humanity International, is an international, non-profit organization devoted to building “safe, reliable and affordable” housing for the less fortunate. Their program is truly something to be proud of and we at Jerry’s Siding & Roofing believe in community service and helping out others when we can.

For more information on the Preview Party event, please visit their registration page here.